Saturday, September 18, 2010
Vegetarian Posole
I love posole. The thick rich spicy soup broth, the hominy (nixtamal in Spanish, or technically Nahuatl), and of course the additions. Cilantro, shredded cabbage, radish, avocado, lime juice, baked tortilla strips, and on and on. The beautiful thing about the stock is the introduction of ancho chiles (dried poblanos) that are reconstituted and pureed in the blender. It makes for a complex and spicy broth. Of course posole normally has pork or in some cases chicken and so the broths are normally a little heartier. I honestly thought it would be impossible to make a vegetarian version but this comes so close to the real thing I can't say I missed the meat at all. I can't say how happy I was that this worked.
In place of chicken, I used dried shitake mushrooms. They take a while to soften so if they only sit for a couple of hours in the soup, they'll still be a little chewy (which I was okay with because it reminded me of posole's cousin 'menudo', but for reasons I won't get into). By the second day they were much softer and oh so good. The broth was hearty and spicy and everything was perfectly balanced.
This recipe is for the Souper Sunday blog hop hosted by Kahakai Kitchen. Soup... what a great theme. I'm relatively new to making posole so I got my help from girlichef, an excellent blogging chef for all things Mexican (and otherwise) and Bobby Flay. See their recipes here and here. I like girlichef's addition of tomatoes and onion to the blender with the anchos and then cooking them on the stove. It's definitely my new method - I just added a little oregano to the mix because it's one of my favorite flavors in Mexican cooking.
For the base, start with three ancho chiles. Put them in a small bowl (put small cuts in the chiles so they don't float) and cover them with boiling water. After twenty minutes, remove chiles from water (saving the water) and pull the stems out. I like to save a few seeds for the heat. Place chiles in a blender with 1/2 cup of the reserved chile water and the following items:
1 medium sized onion, chopped
1 tomato, chopped
3 garlic cloves, smashed
2 t. fresh oregano leaves
Blend for a couple of minutes, pausing to scrape sides of the blender down with a rubber spatula. Heat one tablespoon oil in large soup pot and add chile puree. Cook for about 10 minutes, letting mixture thicken. Add six cups of vegetable broth and heat through, bringing to a boil. Add:
1 28-ounce can of hominy (don't drain, include all the liquid in the can)
2 cups (loosely packed) of dried shitake mushrooms.
Simmer for about 20 minutes and add two tablespoons of chopped cilantro. Continue to simmer for another 10 minutes or so. Garnish with any (or all!) of the following.
Freshly chopped cilantro, green onions
Quartered lime wedges
Chopped or grated radishes
Shredded cabbage
Dried oregano
Avocado slices
Enjoy! I'm going to be making this again and again!
Friday, September 17, 2010
A Very Excellent Vegetable Broth
The elitist taco has taken a back seat these past few weeks as I get re-accustomed to the school year, teaching two classes and actually working on my dissertation. While I'm still cooking (enchiladas de mole and posole this week!), not many things are that new or postable. But the posole has been a real discovery. I'll be posting that in a couple of days.
Officially, both the elitist taco and its author are now 100% vegetarian. The blog was mostly vegetarian already, but now it is for sure. It's nice to give it an identity and I'm happy to make my own vegetarianism official. I've been headed this direction for awhile and I'm feeling great about it. There are a variety of reasons, but none really matter much to the blog. What matters now, is how to creatively adapt recipes and still have a great flavor. I might miss late night hamburgers from Rally's or bacon but truthfully, it was the homemade chicken broth that I had gotten used to that I was saddest about. A good chicken broth has so many great uses. When I came across Bobby Flay's method of reducing a chicken broth for an hour or so after it was already done, something that intensified the flavors, I was sold. We've been making our own vegetable broths for a while now, but for the most part they're clear and have little in the way of body. So I set out to make a great vegetable broth that could be used in a soup like posole, which really depends on a good broth. In an effort to give the broth some depth of flavor, I threw in a couple of potatoes and a few mushrooms. For a final step I took a boiled potato, threw it into the blender with some of the stock and blended it until smooth. The texture it added to the broth was awesome and it really made a difference.
So here's the recipe.
3-4 stalks of celery, washed
2-3 carrots, scrubbed (not peeled), split down the middle
2 potatoes, scrubbed and quartered
4 garlic cloves, smashed (skins left on)
1 large onion, quartered (skins left on)
1 poblano chile, halved and seeded
white button mushrooms (small box - washed and sliced)
Of course, a vegetable broth can have pretty much anything you have on hand. Often we'll keep the tough spine from kale and throw that in. Some nice additions are black peppercorns, fresh thyme, fresh cilantro etc.
Place all the vegetables into a large soup pot and cover with cold water. Bring to a boil and turn to medium low, cooking uncovered for an hour. Remove vegetables and let cool (save some potato for later).
When I was ready to use the stock, I heated it up on the stove, while I combined some broth with a few potato pieces in the blender. Once that was reintroduced into the broth, I added salt to taste and... there you go. For a little extra flavor, I added 2 cups of 'chicken broth' (Better than bouillon brand, vegetarian) that I mixed up.
This is my new go-to broth. Even before I introduced chile for the posole base, it had a nice, complex flavor. I'm sure it'll be a little different every time I make it, but I think the potato will make constant appearances.
Tuesday, August 31, 2010
Zucchini Crust Pizza: Real Food
My wife discovered this recipe in search of something to do with our zucchini and wow, what a find. Who would've thought that zucchini could be grated and baked into a flatbread. We stay pretty faithful to the crust recipe (originally a Moosewood recipe, but find another version at this great blog here), and our own gluten-free sympathies have moved us toward to finely-ground polenta. And let me just say, with cheese mixed into the zucchini, this is amazing - and smells really good as it bakes. I would say, based on the criteria of the challenge, this satisfies the soul (as well as the waist-line) and I think it's got a complex flavor while helping you get a couple servings of your veggies at the same time. It's been a good year for zucchini (from the farm share - I got one zucchini and then little pests attacked my plant) and tomatoes, so this is perfect.
You can top it anyway you like. We used a homemade tomato sauce made from cherry tomatoes, tomato paste, fresh garlic, basil, oregano and thyme. We had so many fresh cherry tomatoes that we ended up using it again for eggplant parmesan a couple days later.
Finally, we topped it with some grated mozarella and paremsan and there you have it. Here's the recipe:
2 cups grated zucchini
2 eggs
1/4 cup finely ground corn meal (plus some more for the pan)
1/2 cup grated mozarella
1/2 cup grated parmesan
1-2 tablespoons of Italian seasoning
1 tablespoon olive oil
Preheat oven to 400 degrees. Butter and flour a cookie sheet. Mix together all the ingredients and spread out into pan. Bake until golden brown, about 40 minutes. Brush with olive oil at about 20 minutes. Remove from the oven and let cool for about ten minutes. Work on loosening the crust from the pan with a large spatula. Top as desired and place back into the oven until cheese has browned.
Enjoy!
You can top it anyway you like. We used a homemade tomato sauce made from cherry tomatoes, tomato paste, fresh garlic, basil, oregano and thyme. We had so many fresh cherry tomatoes that we ended up using it again for eggplant parmesan a couple days later.
Finally, we topped it with some grated mozarella and paremsan and there you have it. Here's the recipe:
2 cups grated zucchini
2 eggs
1/4 cup finely ground corn meal (plus some more for the pan)
1/2 cup grated mozarella
1/2 cup grated parmesan
1-2 tablespoons of Italian seasoning
1 tablespoon olive oil
Preheat oven to 400 degrees. Butter and flour a cookie sheet. Mix together all the ingredients and spread out into pan. Bake until golden brown, about 40 minutes. Brush with olive oil at about 20 minutes. Remove from the oven and let cool for about ten minutes. Work on loosening the crust from the pan with a large spatula. Top as desired and place back into the oven until cheese has browned.
Enjoy!
Cooked salsa #2, end of the summer...
First week of classes - Summer is officially gone in Bloomington. It's a good thing for my productivity so I can't complain. Last weekend was our Farmers' Market's salsa contest. I've entered a few times in the past, getting second once before and first place also. I made a salsa that I've been working on for most of the summer. Most recently I've tried pureeing half of the roasted tomatoes and coarsely chopping the other half. I put both sets of tomatoes into a saucepan and cook on low with three crushed garlic cloves and a tablespoon of dry white wine for about an hour to cook out the water (which there is always a lot of) while intensifying the tomato flavor. The wine adds a nice element and I find a little garlic is always necessary.
So on to the contest. I entered a cooked salsa into the salsa contest and it was not my best one, but it was still pretty good and it took second. I couldn't get my hand on any anaheim green chiles, which are my favorite, so I'm making sure to include them in this recipe. For the contest I used hungarian and cayenne which are pretty good but not anaheims.
So here's my salsa recipe.
Ingredients:
8 large heirloom tomatoes, roasted and peeled
5-6 anaheim chile peppers, roasted, peeled and chopped*
2-4 jalapeño peppers, roasted, peeled and chopped
3 cloves garlic, minced
1 T. dry white wine
4 green onions, chopped
1/4 c. cilantro chopped
1 lime, juiced
Sea salt (depends on you) and 1/2 t. dry oregano (crushed finely)
Start with half of the roasted tomatoes and put them in the blender and mix at a low speed for about 30 seconds. Coarsely chop the rest of the tomatoes. Add all tomatoes to a sauce pan and turn heat to low. Add wine and garlic to the tomatoes and cook on low for about an hour.
When hour is up, add diced chiles to the tomatoes. At this point you can add a little salt and taste the salsa to see how it's faring. Continue to cook for another 30 minutes. Remove from heat and let cool.
When salsa is cool, stir in onions, cilantro, lime juice and oregano. While I imagine everyone has different ideas on what goes well in a salsa and what doesn't I am a huge fan of dry oregano. It holds its own against all the spice and even the cilantro. I love it. Give it a try if you haven't before.
Saturday, August 21, 2010
Vacationing in the madre tierra
Photo grabbed from here.
I'm back in Arizona visiting with my family and enjoying a reprieve from the Indiana humidity. In my opinion, the hot, dry weather is great and not as tiring as the humidity back in the midwest. Then again, I'm always in air-conditioned areas, or my parents' pool, so that probably has something to do with it.
Tomorrow I'm going to make green rice for our traditional Sunday dinner. Generally that involves my dad grilling outside, my sisters' amazing pies or cakes, and everything that is good about food. I'll post the green rice recipe tomorrow and then maybe later on next week I'll get back to some more recipes once I'm back in IN.
A pic I took of a storm coming over the Estrella mountains. I definitely miss the mountains when I'm in the flat midwest.
Saludos!
-Jose
I'm back in Arizona visiting with my family and enjoying a reprieve from the Indiana humidity. In my opinion, the hot, dry weather is great and not as tiring as the humidity back in the midwest. Then again, I'm always in air-conditioned areas, or my parents' pool, so that probably has something to do with it.
Tomorrow I'm going to make green rice for our traditional Sunday dinner. Generally that involves my dad grilling outside, my sisters' amazing pies or cakes, and everything that is good about food. I'll post the green rice recipe tomorrow and then maybe later on next week I'll get back to some more recipes once I'm back in IN.
A pic I took of a storm coming over the Estrella mountains. I definitely miss the mountains when I'm in the flat midwest.
Saludos!
-Jose
Sunday, August 15, 2010
Tostadas and a dissertation on cultural relativity
Okay, not a dissertation in the sense of the doctoral dissertation I'm not writing but one none the less, just shorter. But first tostadas. Tostadas are one of my wife's favorite foods. I grew up eating them pretty frequently and they never excited me that much. I don't make them too differently these days, but Rosie's excitement must've been contagious because they are now one of my favorite meals. For one, they are a healthy dinner. Baked corn tortillas, homemade refried beans and all the lettuce, tomato, avocado (and homemade salsa) you can pile on. And they're incredibly satisfying. What's not to like? They're also very leftover friendly. If you wanted to use up some leftover chicken, just chop it up and throw it on. Also, if you want the extra protein and want to make them a little heavier add a fried egg. Awesome...
So what is a tostada? Tostada means 'toasted' in Spanish but here it's a noun, not an adjective (since it's feminine, it's probably referring back to tortilla - 'the toasted tortilla/the thing that is toasted'). I've just finished teaching a 2 month long course on Spanish grammar for non-Spanish speakers (grad students who need to fulfill a language requirement who learn how to translate academic articles) and as a result my mind is stuck in the intricacies of the Spanish language. So back to that big what is a tostada question, and my whole thing. Cultural relativity is the kind of thing I think about when I'm writing about European colonization of the "New" World. So when I frequently hear that a tostada is an "open-faced sandwich", I have to disagree. An open-faced sandwich is an open-faced sandwich, a tostada is a tostada. Or, instead of submitting a culturally distinct cuisine to our own culinary standards, we could say that a tostada is like an open-faced sandwich. An obsession with political correctness? Maybe. But at the same time, why not let terms have their own referents? By the way, did you know that the pineapple, indigenous to the Americas, so astounded 16th century Spanish historian and 'ethnographer' Gonzalo Fernández de Oviedo that he found himself unable to describe it? So astounding and original was its flavor that Oviedo could find no European referents, no equivalents and literally no words to describe it. Face to face with something so foreign (okay, so the Indians were much more foreign to him and he was a pretty ignorant dude), Oviedo named the fruit based on its appearance - piña, because it looked like a pine cone. Imagine, he could have named it 'artichoke fruit' because he also thought it looked like an artichoke. Wow, okay. Tostadas are tostadas, enough. Maybe Gertrude Stein would say a tostada is a tostada is a tostada. Hah hah... Let's get on with the recipe!
Tostada Shells:
We bake our corn tortillas to cut back on the oil from frying while keeping the nice crispy texture. Set the oven on 400 degrees, and lightly brush tortillas with some vegetable oil. Place tortillas on a flat baking sheet. To avoid tortillas curling, I put an upside down cooling rack over the tortillas while they bake. It keeps them nice and flat. Bake for 15 minutes, remove from oven, turn tortillas over and bake for another 8-10 minutes until brown and crisp.
When crisp, top with any of the following ingredients (pay attention to the order!)
Refried Beans
Salsa
Sour cream
Sliced avocado
Grated cheese of your choice
Chopped lettuce
Rosie has the system all figured out. Forget the picture you see in the post, salsa and sour cream on top only cause messy tostadas and fingers. Put your runny stuff down first and then the loose ingredients. Rosie's good at figuring these things out, although she has to remind me about her system every time we have them.
Buen provecho!
Labels:
gluten-free,
Mexican,
philosophical ponderings,
vegetarian
Saturday, August 14, 2010
Friijole beans (easy ones!)
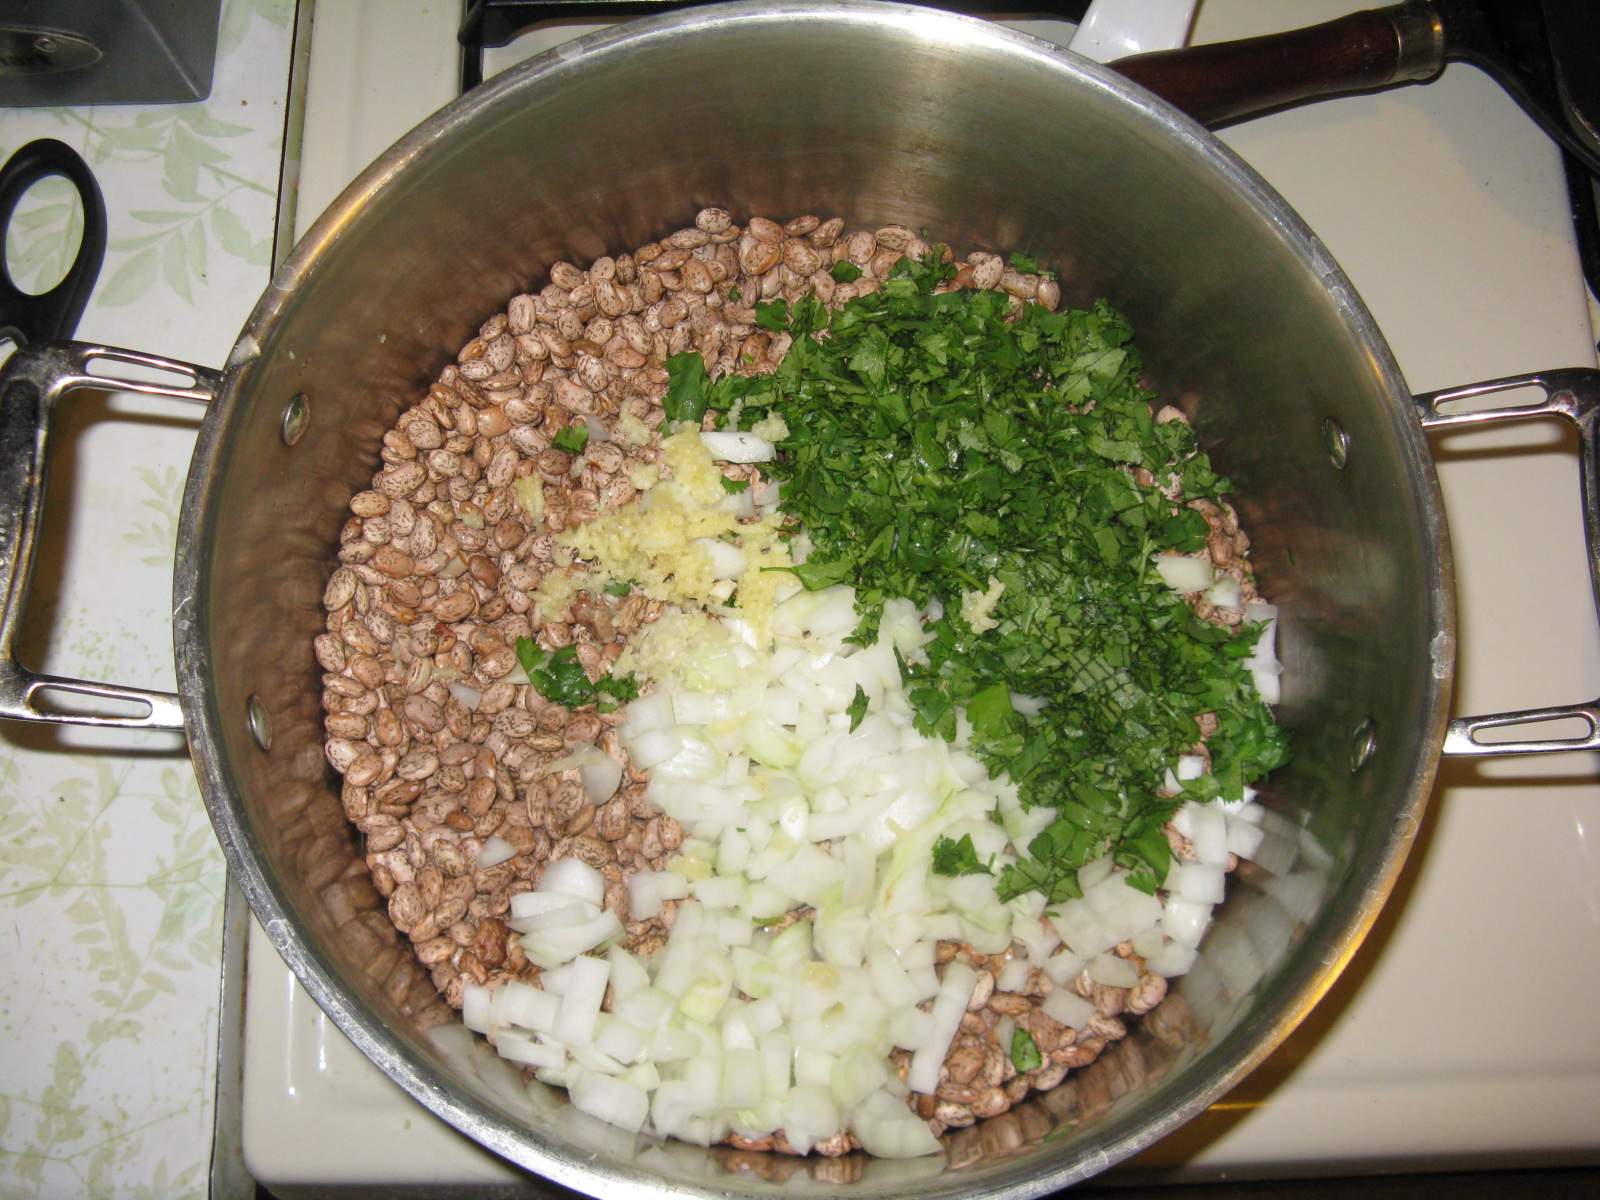
So, refried beans are a necessary accompaniment to a lot of the eating we do around here. Sadly, I only recently stopped buying the canned stuff. In the years that I've been cooking I've never really gotten the recipe down right. Last Summer a friend of mine made some great cooked beans (not refried) that went really well with the barbecue chicken and rice. So I took his recipe and changed it a bit and now we eat them all the time. They fry really well and the recipe is pretty adaptable. Cooked slowly with garlic, onion, and cilantro (and a bottle of beer) the beans take on a nice rich flavor. Right before I mash them I add a little butter, cumin, and dried chile powder. Extra bonus, they freeze really well for future eating.
Ingredients
1 lbs pinto beans
1 large onion, chopped
1 cup chopped cilantro
3+ garlic cloves, minced
1 bottle of beer
freshly ground pepper
2 t. guajillo chile powder
extra possibilities for flavoring: reserved bacon fat, cumin, butter
Rinse beans and sort out for stones or the dried up, cracked beans. Put in a large soup pot and add onion, cilantro, garlic. Add pepper and chile powder. Empty beer into the pot and add about 15 cups of water. Bring to a boil and then turn heat to low. Simmer for 3-4 hours (if I'm going to mash them up, I generally let them go about 4 hours).
(No worries, I still have ones to drink).
When they're soft, stir in a tablespoon of sea salt (at this point I also added a tablespoon of bacon fat).
To re-fry: Put two cups or so of the beans into a pan with a little liquid. Mash them with a potato masher over medium heat. If there's a little excess liquid, just continue to heat until liquid has reduced.
Another good thing is that you can freeze beans (with a little liquid) for future use. No more canned beans!
Enjoy!
Subscribe to:
Posts (Atom)